Zotero + your Synology NAS
Here’s how you can automatically sync Zotero to your Synology NAS using WebDAV.
Zotero is an archiving tool for research. It automatically saves snapshots of the websites & research papers you archive, but to sync a lot of snapshots between devices you either need a paid storage subscription or your own WebDAV server. This is how I set one up on my Synology NAS. It took me about 30min when I was learning how.
Step 1: set up WebDAV & remote access on your Synology
On your Synology NAS, set up WebDAV:
- Set up a DDNS hostname for your Synology.
- It’s easiest to use Synology for this (
*.synology.me). - To do this securely, you must set up
https, e.g. via the Get a certificate from Let’s Encrypt and set it as default checkbox or with your own manual certificate. - Set up port forwarding, for at least port
5006.
- It’s easiest to use Synology for this (
- Set up WebDAV.
- I only enabled
HTTPS, notHTTP, since I don’t want to connect insecurely by accident. HTTPS uses port5006by default, which I left unchanged.
- I only enabled
Next, choose/create a user & Shared Folder to sync with:
- Choose or create a Shared Folder that Zotero will sync to.
- You can use an existing folder; Zotero can sync to a subdirectory.
- Choose or create a user that Zotero will connect with.
- I recommend a non-admin user with limited access to only the one Shared Folder you’ll use. This reduces the danger of exposing your NAS as a WebDAV server, especially if no other account is allowed to use WebDAV.
- Make sure the user has permission to use the WebDAV application.
You now have everything you need to connect to your drives with WebDAV: specifically, your remote access URL (and WebDAV port), your Shared Folder name, and your user info to login.
You’ll use this info to connect Zotero.
Step 2: connect Zotero to your new WebDAV server
For each computer (or phone!) running Zotero:
-
In Zotero, open Preferences:
- On Windows: Edit > Preferences
- On Mac: Zotero > Preferences
- On iOS: outside of My Library, click the settings cog, then Account
-
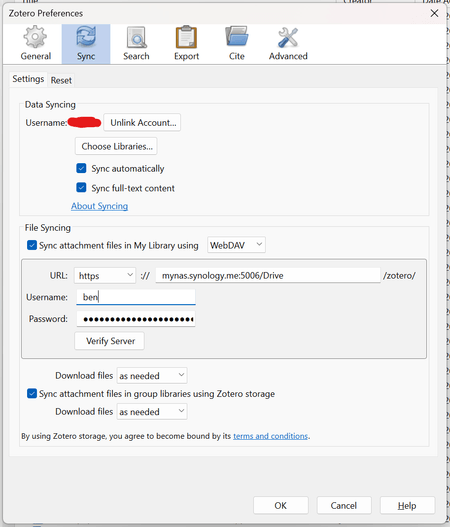
On the Sync tab, under File Syncing, check
Sync attachment files in My Library using, then change the dropdown fromZoterotoWebDAV. -
In the form that appears, select:
- URL schema:
https - URL: from step 1, ① your remote access URL plus ② your WebDAV HTTPS port (
:5006) plus ③ your Shared Drive name- For example,
mynas.synology.me:5006/Drive - Ben - If you want to sync to a subdirectory, add that, too:
mynas.synology.me:5006/Drive - Ben/my/sub/directories. - Zotero will automatically create a further
/zotero/subdirectory.
- For example,
- Username: a username with read/write access to that Shared Folder, e.g.
ben. - Password: the user’s password.
For example:

- URL schema:
-
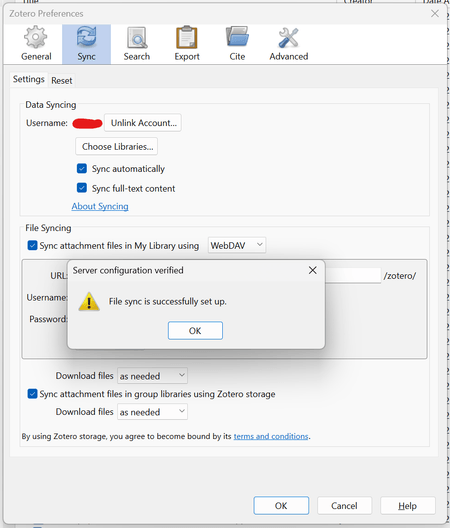
Click
Verify Server. A popup should read:File sync is successfully set up:
You’re done!
See also
- More in-depth Reddit tutorial, using different certificates.
- Thread on Zotero forums, exploring local access.